ZenProg Remote: 2. Getting started
2.1. Logging in
ZenProg Remote uses the Zennio Remote credentials. The first time the application is opened, the log-in panel appears automatically (Figure 3). It can also be opened at any time by clicking on the user button at the bottom of the side bar.
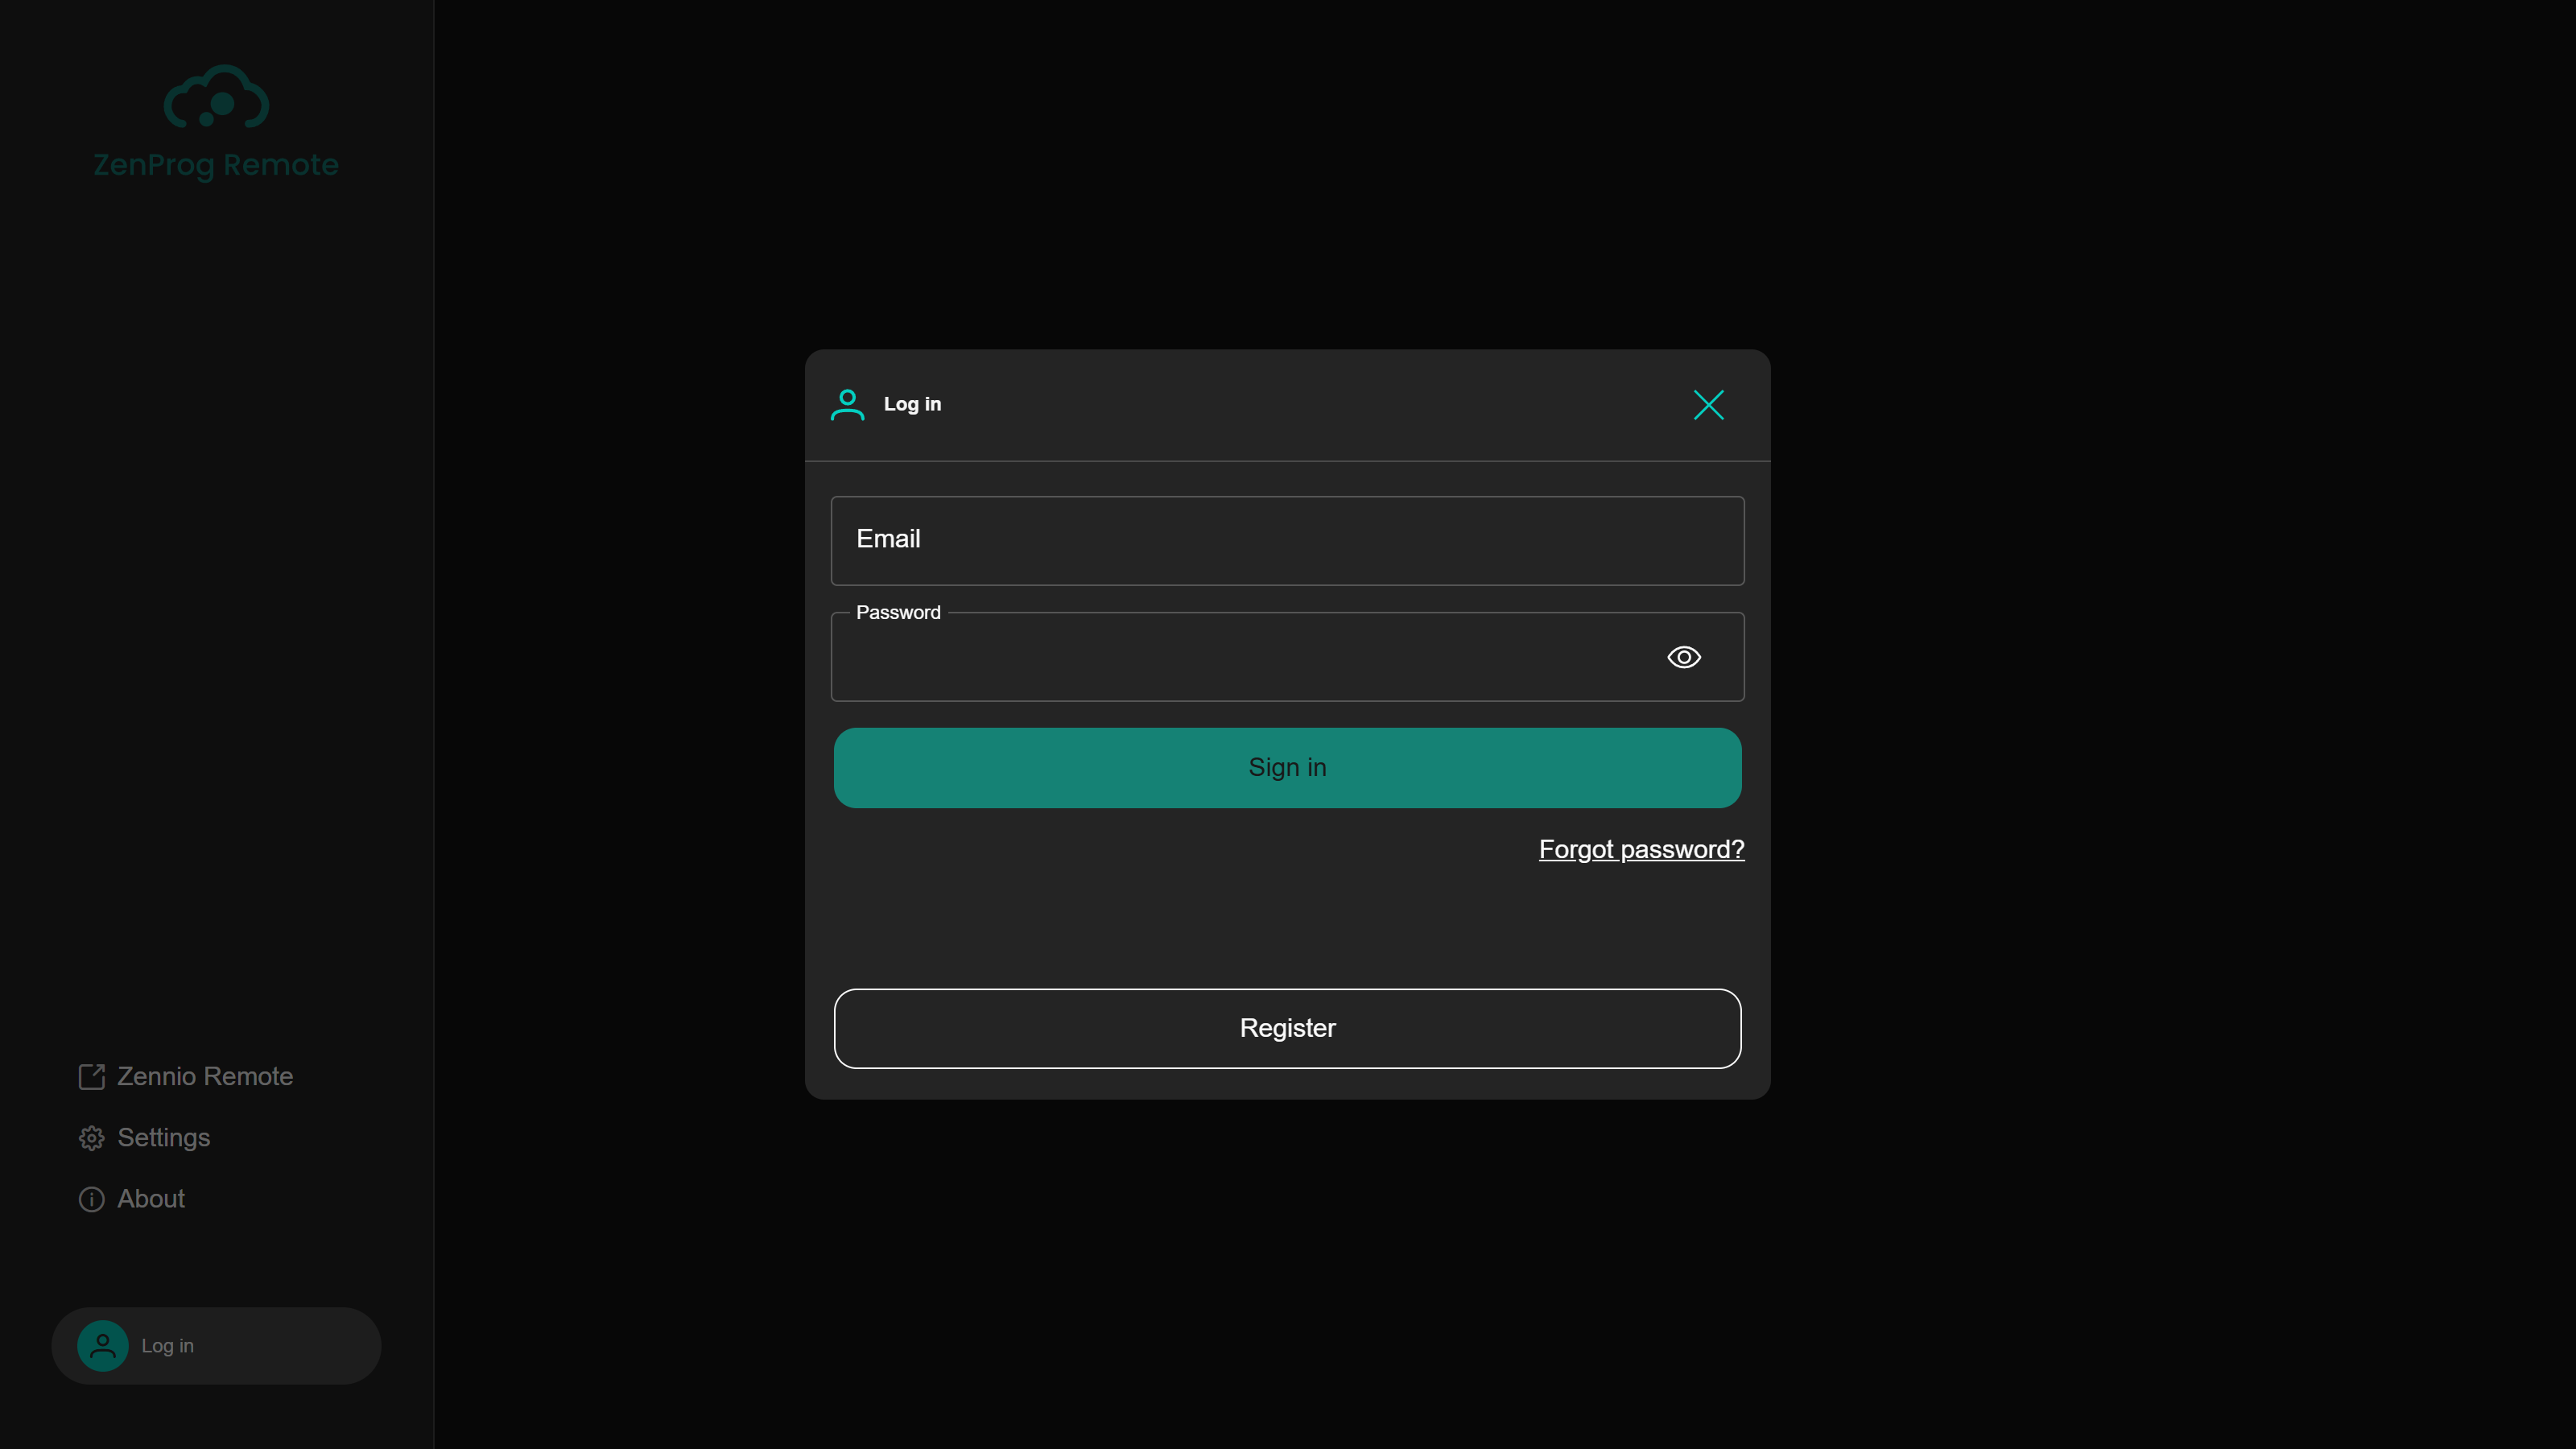
From this panel it is possible to:
- Log in with the Zennio Remote e-mail address and password.
- Recover the password through “Forgot password?”.
- Create a new account through “Register”. Registering implies accepting the legal documents of the Zennio Remote ecosystem (see section 2.2).
Once logged in, the application remembers the session: on subsequent launches it connects automatically without asking for the credentials again. A loading indicator is shown while the session is being restored.
To sign out, click on the exit icon next to the username and confirm. Signing out interrupts the connection with the device that was in use.
2.2. Legal documents
ZenProg Remote is governed by the legal documents common to the Zennio Remote ecosystem: the End-User License Agreement (EULA), the Terms and Conditions and the Privacy Policy. Their acceptance is linked to the account and takes place on registration.
When Zennio publishes a new version of any of these documents, the application shows it on the next log-in and does not allow the user to continue until it is accepted:
- The EULA is shown inside the application itself. It is necessary to scroll to the end of the text before “Accept” can be pressed.
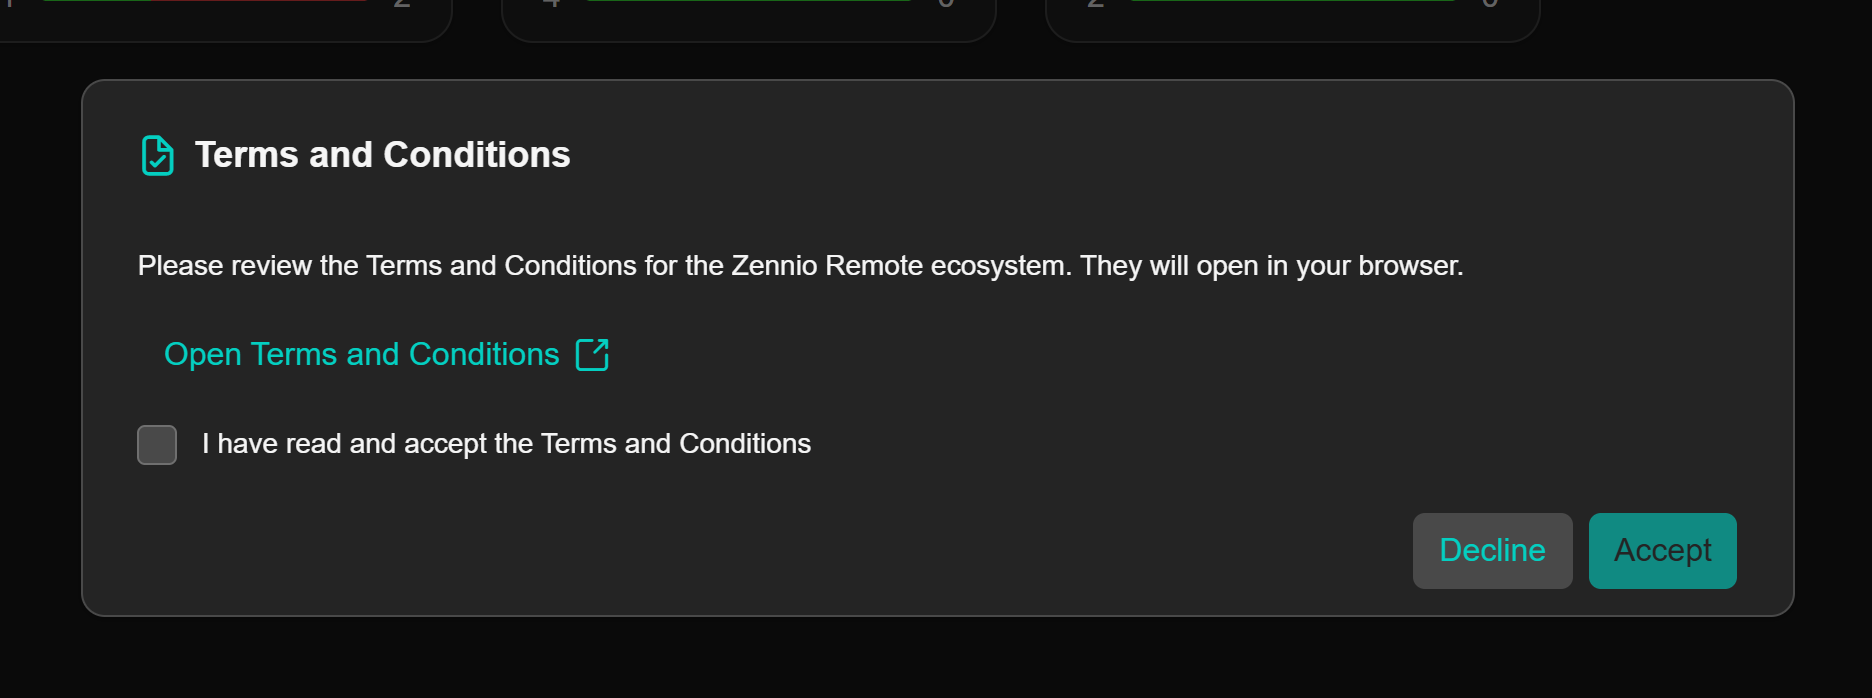
- The Terms and Conditions and the Privacy Policy open in the browser. To accept them, the confirmation checkbox must be ticked (Figure 4).
Important
If “Decline” is pressed on any of the documents, the application closes. ZenProg Remote cannot be used without accepting the legal documents in force.
2.3. The main window
After logging in, the dashboard is shown (Figure 5). The window is divided into three areas:
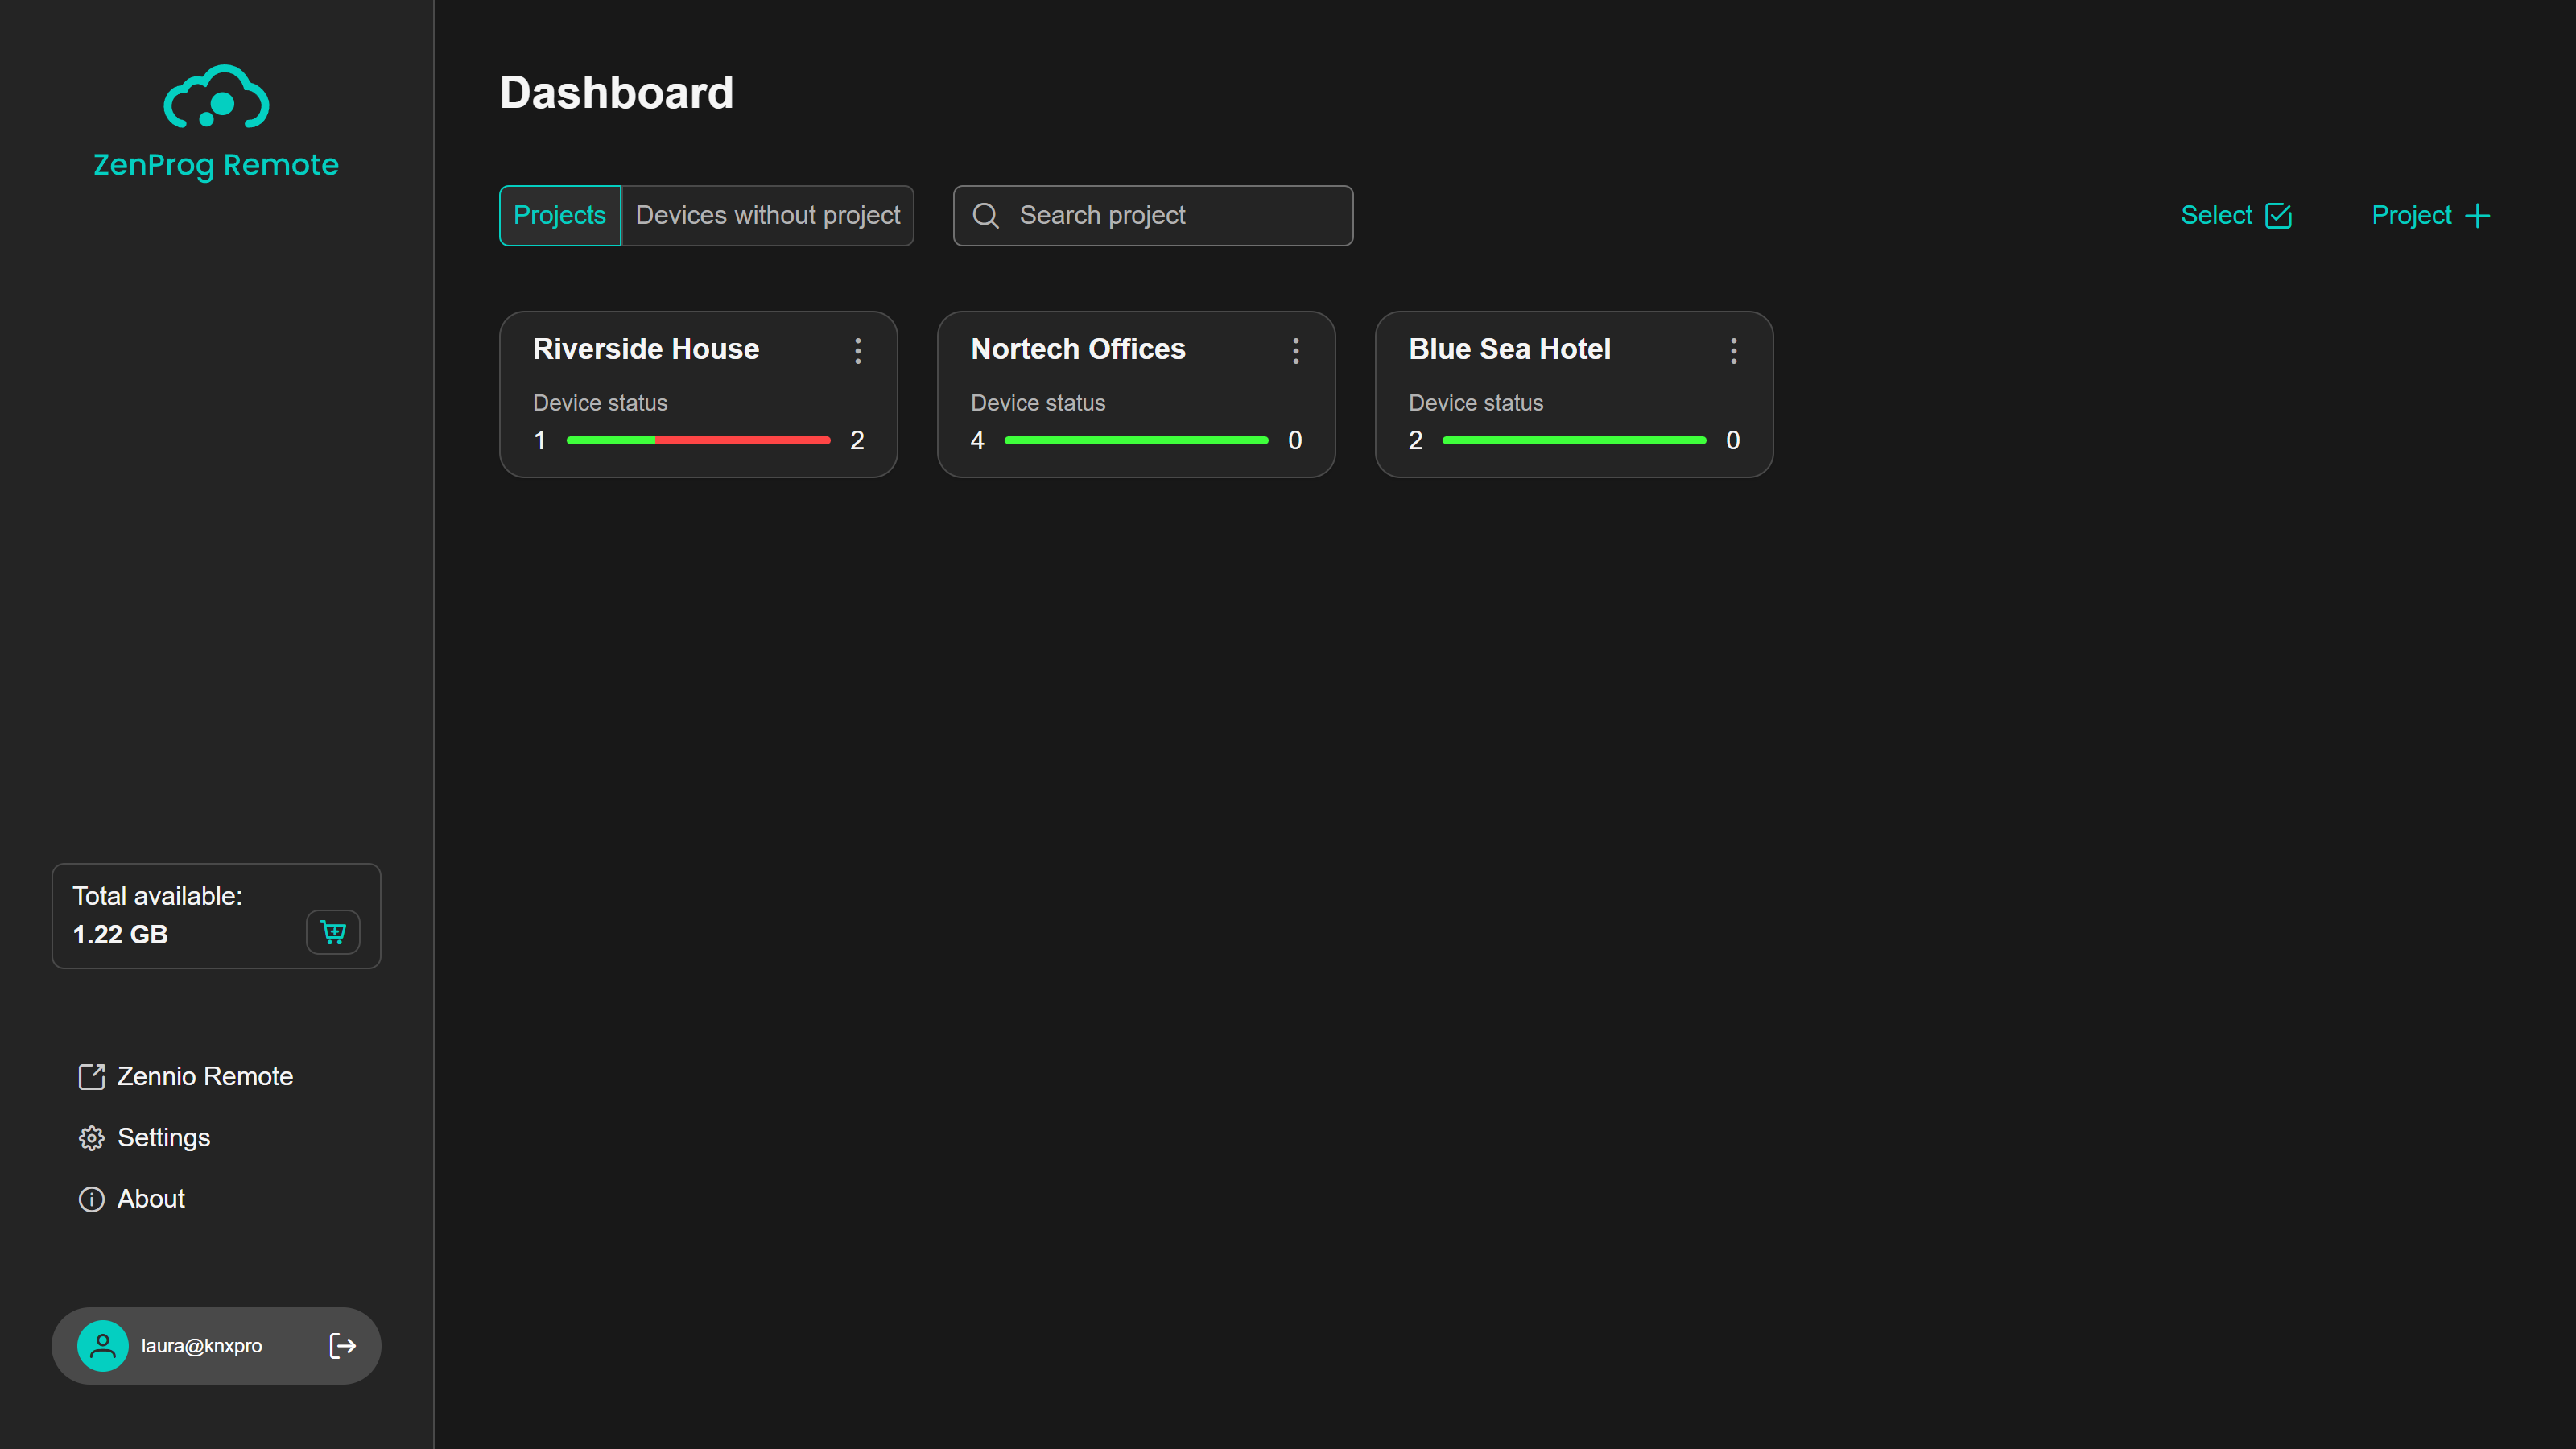
- Side bar (left):
- The ZenProg Remote logo, which returns to the dashboard from any screen.
- The Total available card, with the MB balance of the account and a trolley button that opens the licenses page (see section 6.2).
- The application menu: Zennio Remote (opens the web portal in the browser), Settings (see section 7) and About (see section 8).
- The logged-in user and the sign-out icon.
- Central area: shows the dashboard, the view of a project or the settings, licenses and about pages.
- Footer: appears only while there is a connection with a device. It indicates which device is connected and allows the user to disconnect (see section 5.1).
2.4. Connection status
ZenProg Remote needs a connection with the Zennio servers. The side bar shows the connection status at all times (Figure 6); while there is no connection, the actions on devices are disabled.
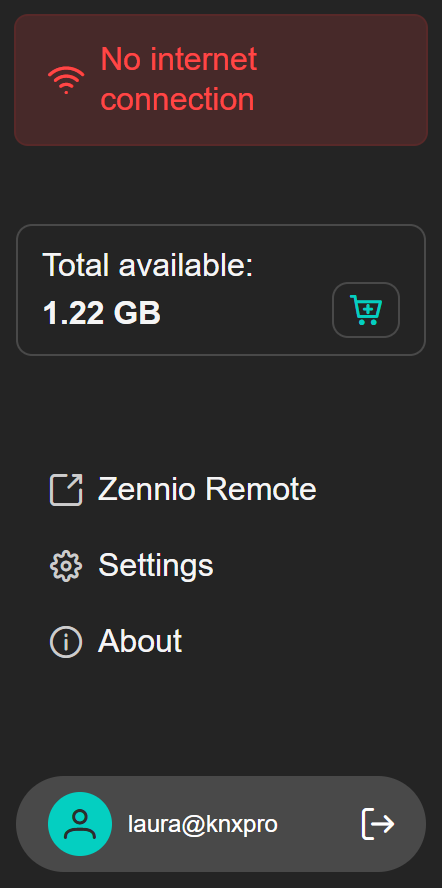
Reconnection is automatic. If there was an active connection with a device when the drop occurred, it is lost and it will be necessary to connect again manually.