ZenProg Remote: 5. Connection and programming with ETS
Programming a remote installation consists of three steps: connecting to the Zennio device of the installation, selecting the KNX/IP interface that will perform the download and choosing the “[ZenProg]” interface in ETS.
Note
When using a topology with an IP backbone and KNX Secure in the ETS project, the sending of telegrams may be affected by the time configured in the “Network Latency” field. This parameter sets a maximum time tolerance window that the devices will accept in order to process multicast frames in KNX IP Secure communications.
5.1. Connecting to a device
It is only possible to connect to online devices (green) with compatible firmware and, in the case of technician pairings, with a maintenance access approved or automatically enabled (see section 3.4).
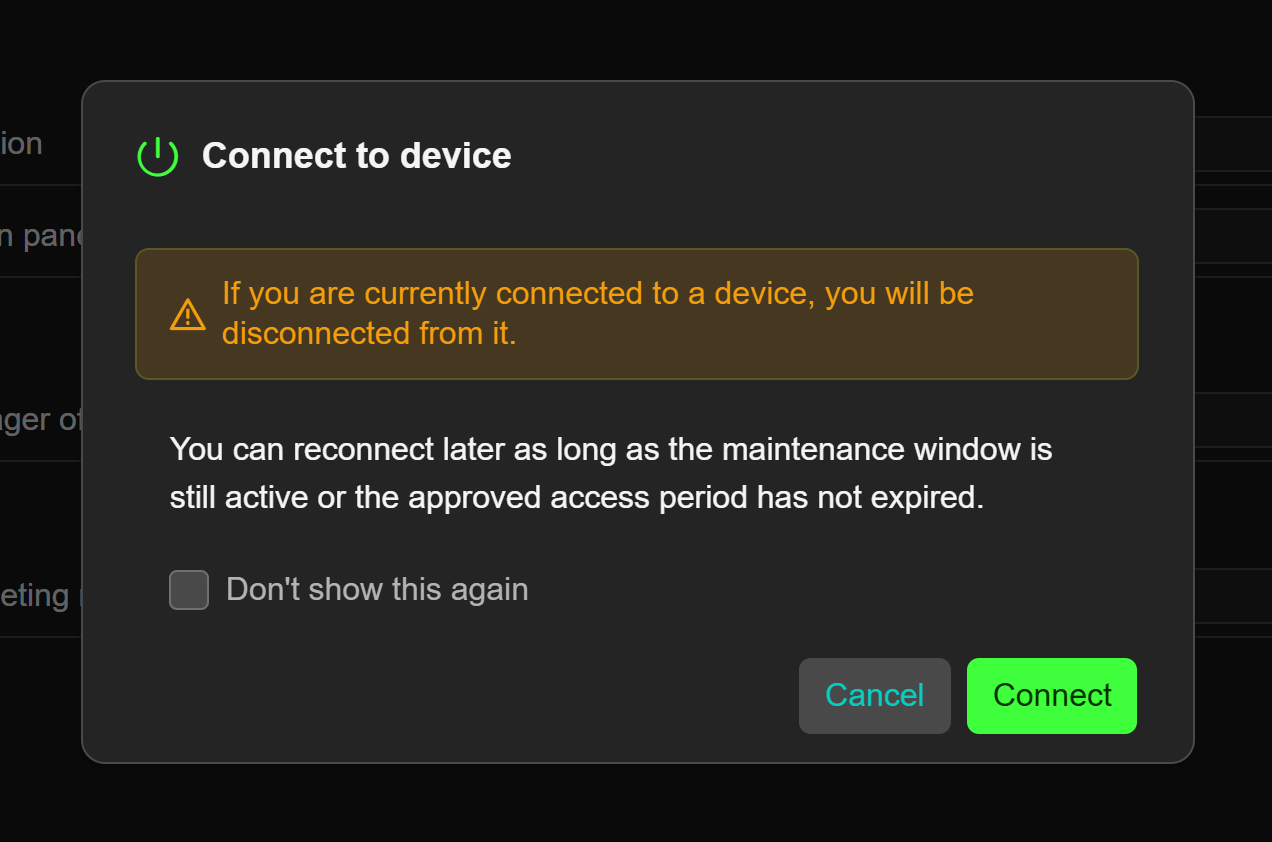
To connect, click on the power button on the right of the device row, or on “Connect to device” inside the interface drop-down. The application asks for confirmation (Figure 26); the “Don't show this again” checkbox prevents this warning in the future.
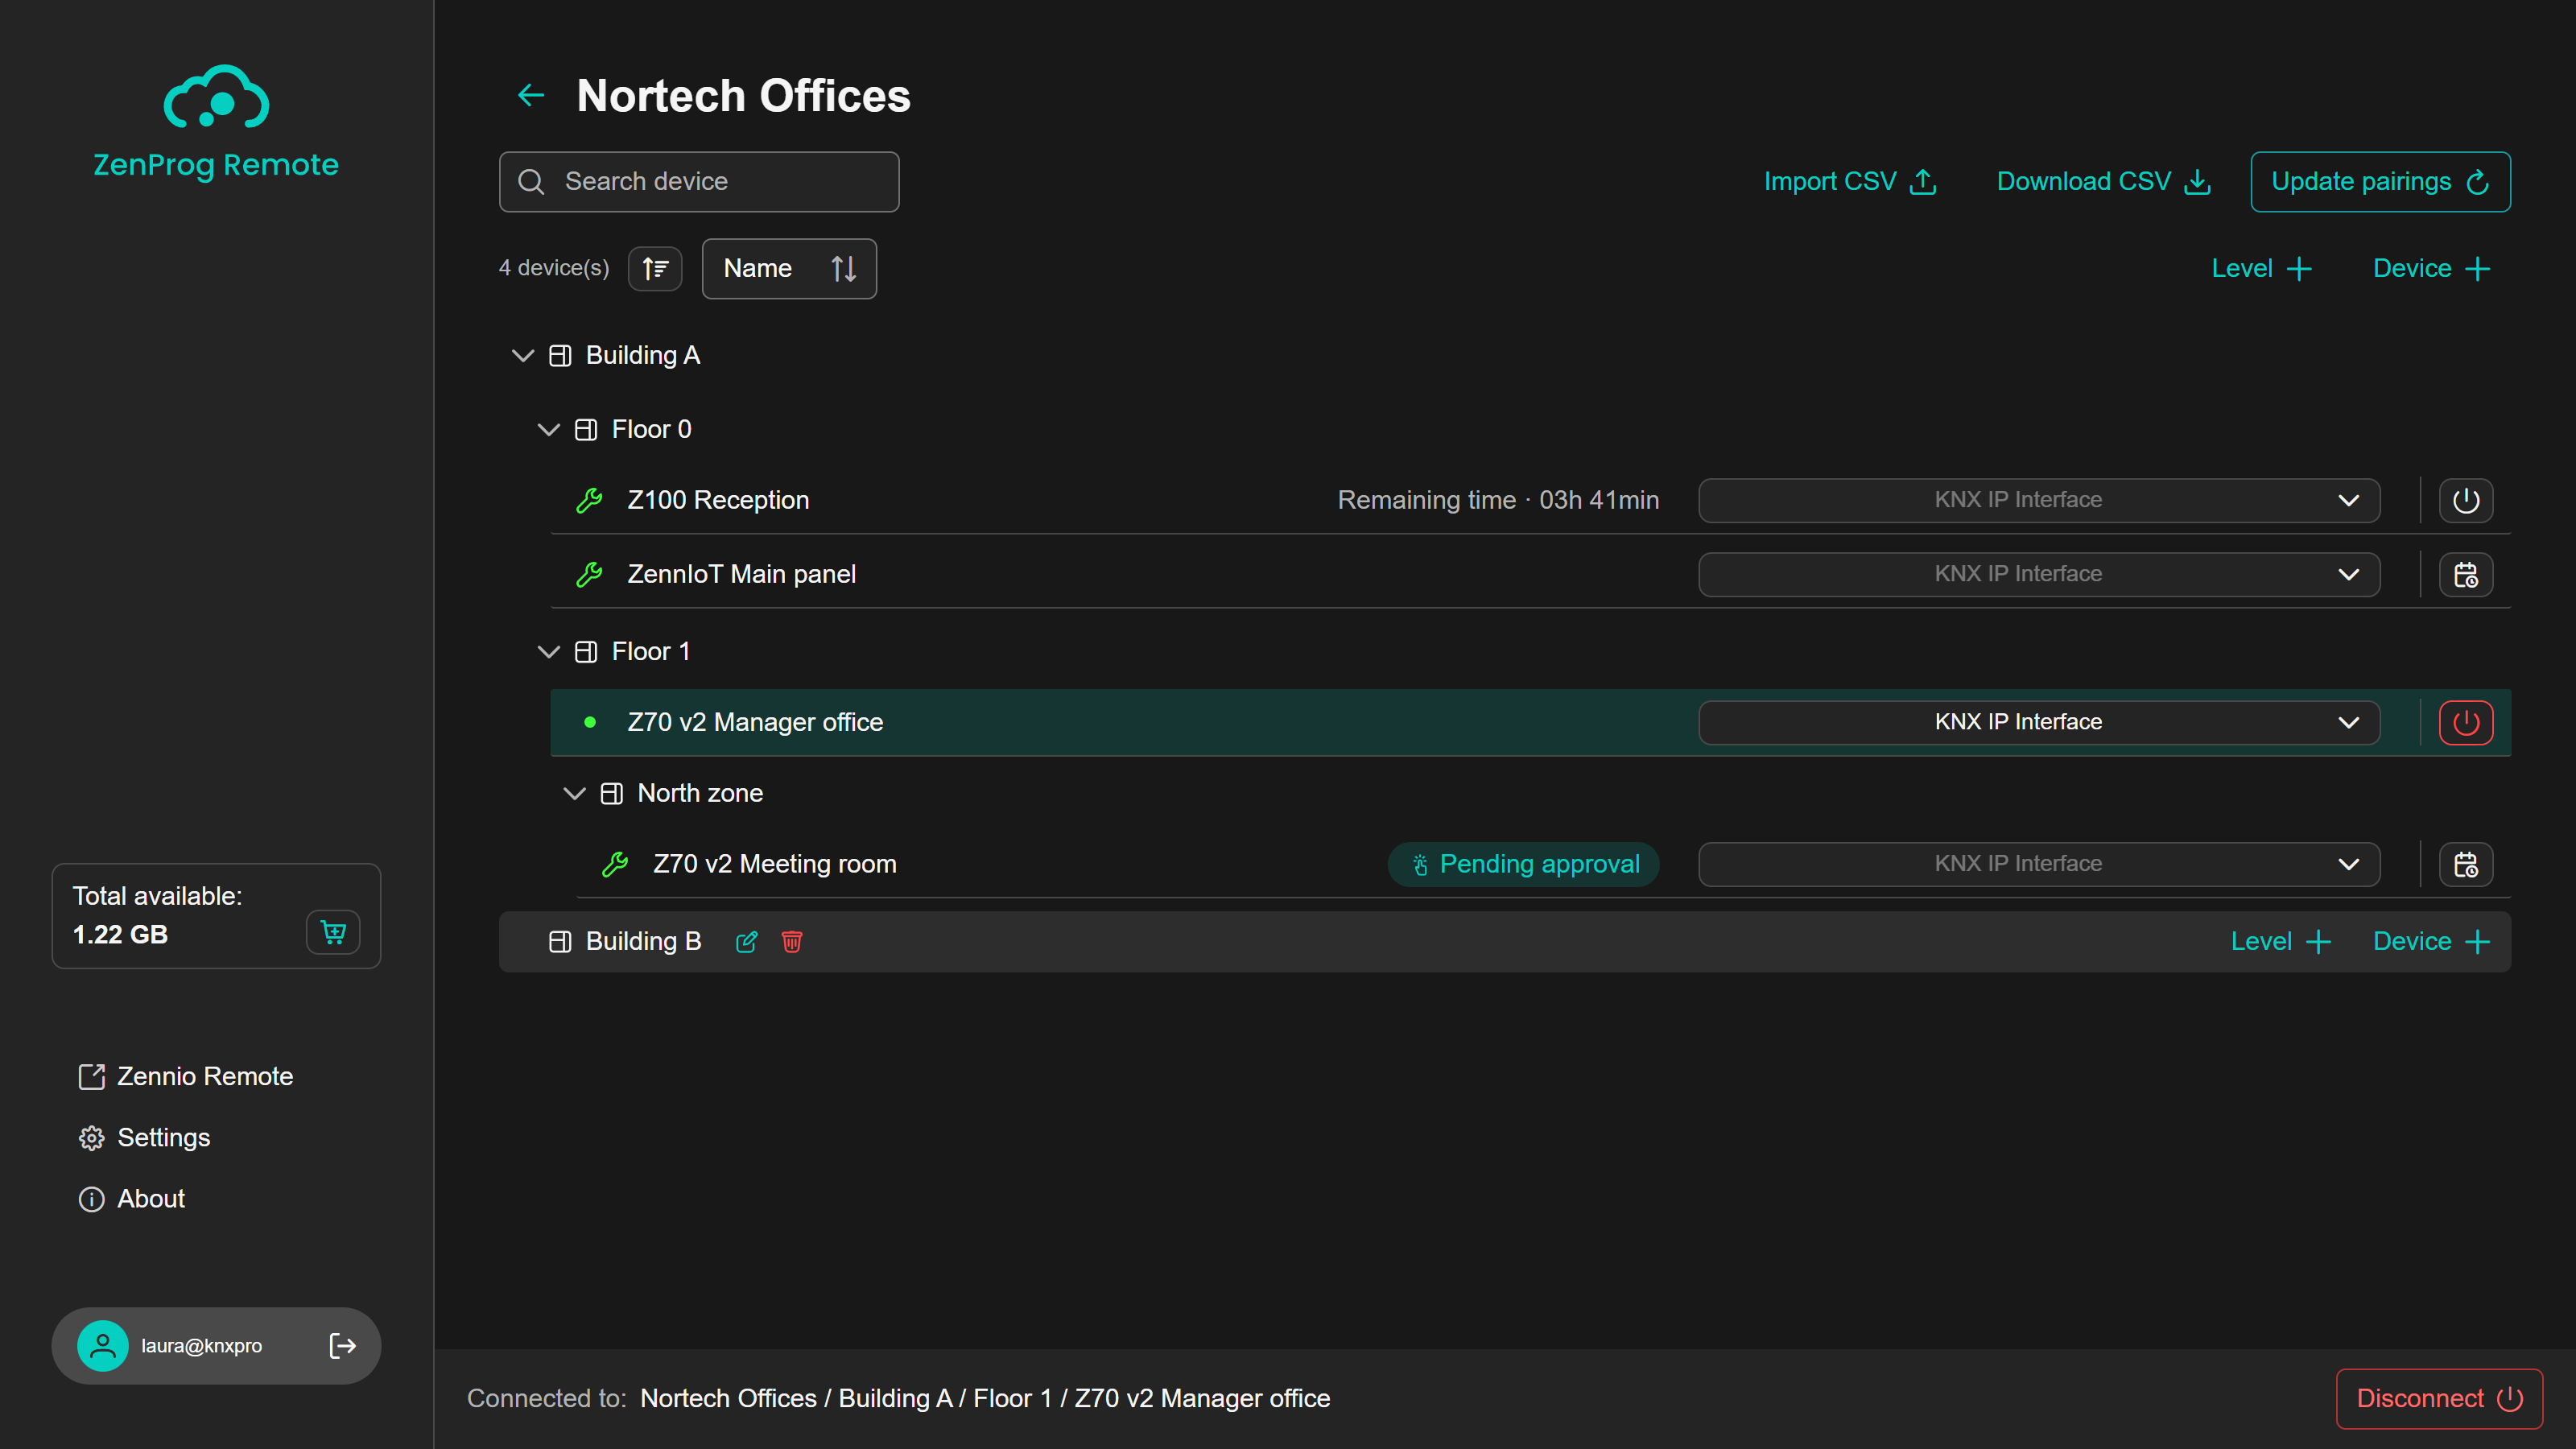
There can be only one active connection. On connecting to another device, the application disconnects from the previous one. While a connection exists, the footer indicates the device (with the path of the project and its levels) and offers the “Disconnect” button (Figure 27). From other screens, the icon next to the name leads back to the connected device. Figure 28 shows the project view with the active connection.

Note
The connection with the device consumes MB from the account balance (see section 6). Disconnecting when the interface is no longer needed is recommended.
5.2. Selecting the KNX/IP interface
On connecting, ZenProg Remote looks for the KNX/IP interfaces the device reaches on its local network and shows them in the “KNX IP Interface” drop-down of the row (Figure 29). Only Zennio KNX/IP interfaces that support programming connections (tunnelling) are listed; the rest of the KNX/IP equipment of the network is discarded.
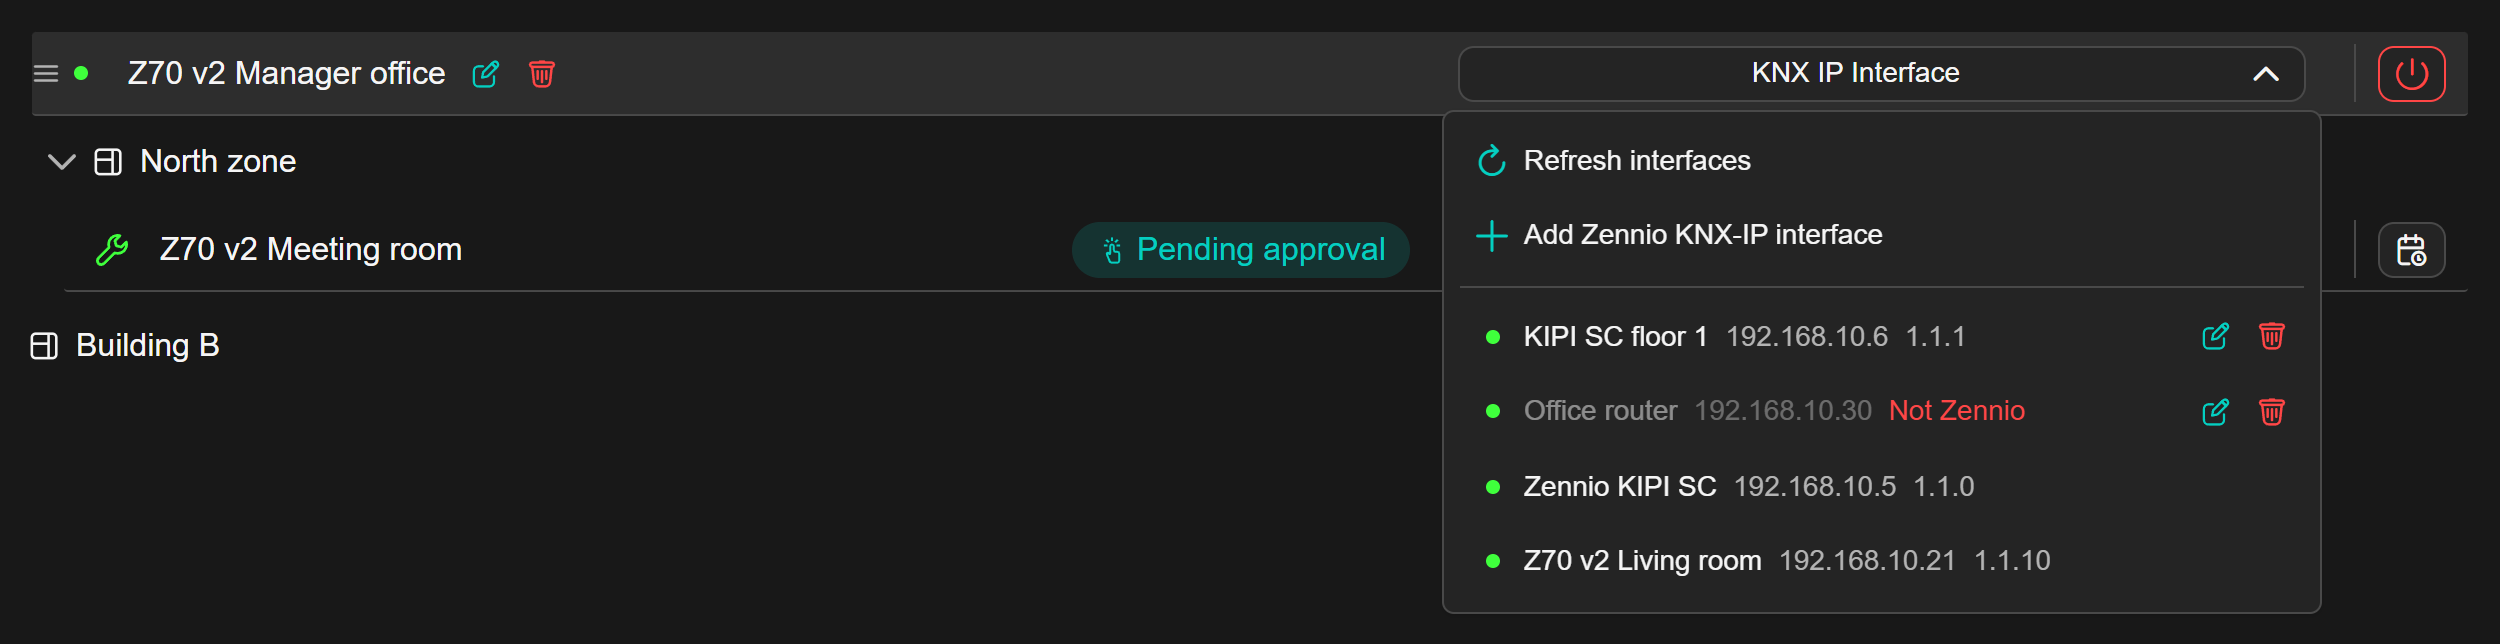
The drop-down contains:
- “Refresh interfaces”: repeats the search for interfaces.
- “Add Zennio KNX-IP interface”: adds a fixed interface by its IP address (see section 5.3).
- The list of interfaces, with their name, IP address and KNX individual address. The coloured dot indicates whether the interface answers.
On selecting an interface, it is shown in the row (Figure 30) and becomes available in ETS with the “[ZenProg]” prefix (see section 5.4).

The application selects an interface automatically on connecting when one of these conditions is met, in this order:
- An interface had already been used with that device in the same session and it is still available.
- There is only one reachable interface, counting the discovered ones and the fixed ones that are online.
The list of interfaces is refreshed on connecting, on pressing “Refresh interfaces” and on adding or deleting a fixed interface.
5.3. Fixed KNX/IP interfaces
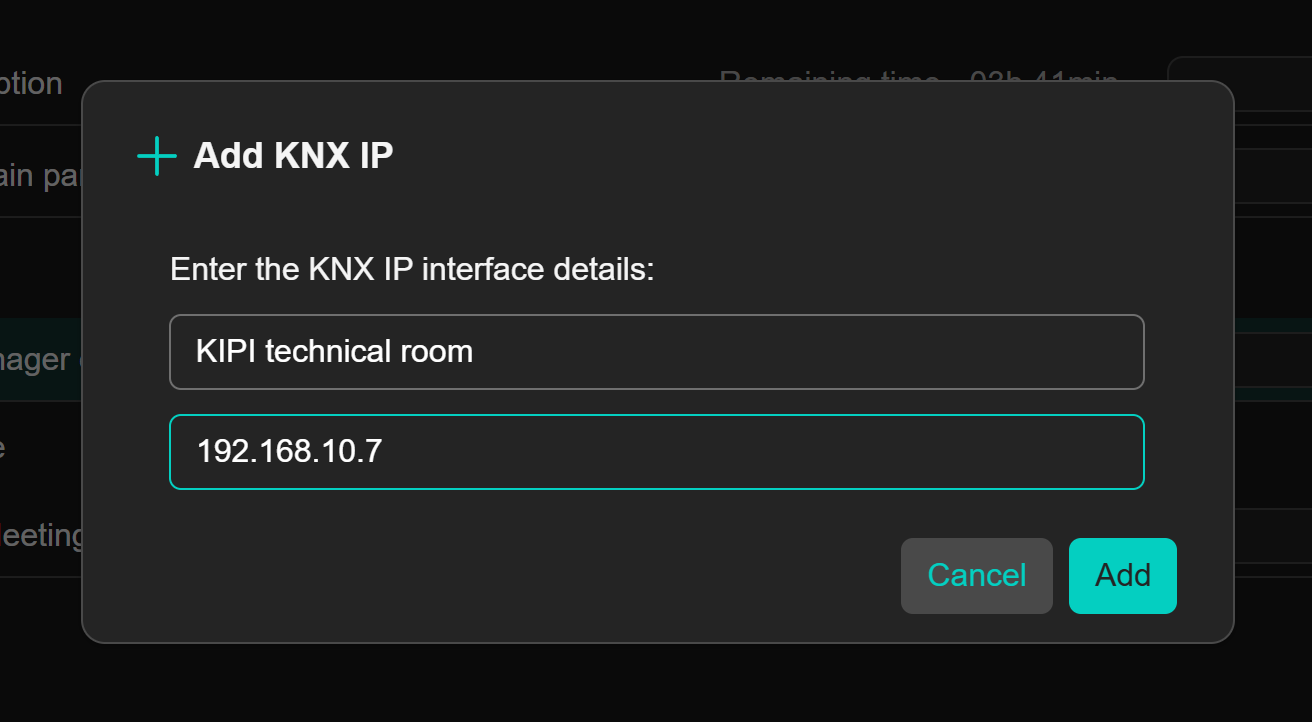
Besides the automatically discovered interfaces, it is possible to fix an interface by giving its name and its IP address (Figure 31). This is useful when the interface is on another subnet or does not answer the automatic search. Fixed interfaces are saved in the account associated with the device, so they are kept between sessions and computers.
Fixed interfaces can be added even if the device is not connected, for example while waiting for the approval of a maintenance access. On connecting, the device checks each fixed interface and the list indicates its state. The icons to edit and delete it appear next to each fixed interface.
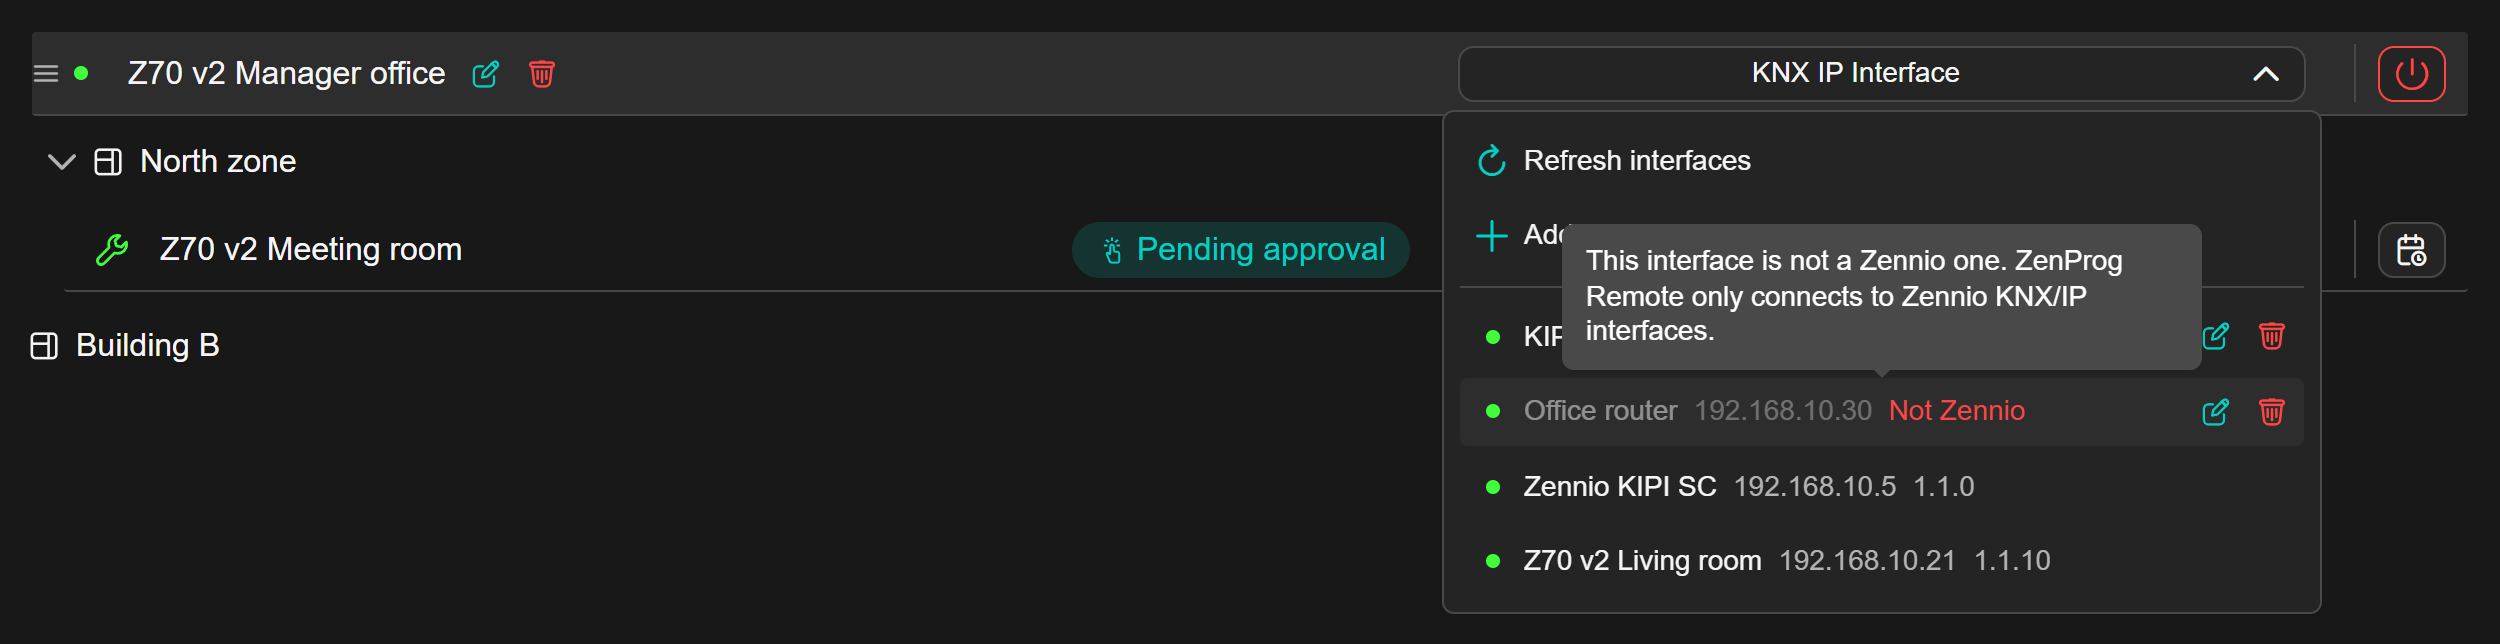
If a fixed interface cannot be used, the reason is shown in red and, on hovering over it, an explanation (Figure 32):
- “Not Zennio”: the interface is from another manufacturer. ZenProg Remote only connects to Zennio KNX/IP interfaces.
- “Unverified”: it has not been possible to check the manufacturer. It is advisable to check that the interface is reachable and to refresh the list.
- “No tunnelling”: the equipment answers on the network, but it does not support programming connections.
Note
Fixed interfaces require firmware 4.4.x or later on the Zennio paired device. With an earlier firmware the application warns about it when they are added; the interface is saved and becomes available once the device is updated.
5.4. Configuring ETS
For safety and robustness, ZenProg Remote communicates with ETS through the local interface of the PC (address 127.0.0.1). The configuration needed depends on the version of ETS.
5.4.1. ETS6
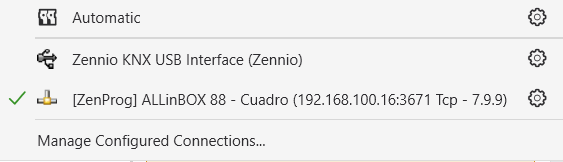
ETS6 detects the interface published by ZenProg Remote automatically. In the interface list of ETS6 it appears with the “[ZenProg]” prefix followed by the name of the interface selected in the application (Figure 33). Selecting it is enough to start programming.
Note
When the interface is disconnected or another one is selected in ZenProg Remote, in most cases ETS6 requires the desired interface to be selected manually again. In tools such as the group monitor the connection has to be restarted.
5.4.2. ETS5
ETS5 does not show the local interface automatically, so it has to be created manually once. In the interface configuration of ETS5, add a connection of type IP Tunnelling with the following data (Figure 34):
- Name: any name, for example “ZenProg Remote”.
- Server: 127.0.0.1.
- Port: 3671.
- Connect using NAT mode: ticked.
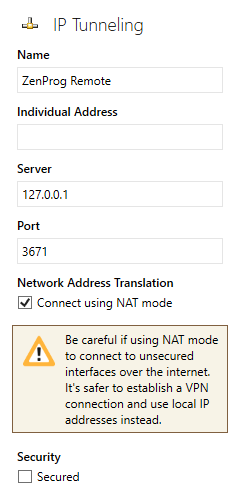
On selecting this connection, all the ETS5 traffic is directed to ZenProg Remote and, through it, to the interface selected in the application.
Note
The ETS Bus Monitor is not available through ZenProg Remote; to supervise the traffic, using the Group Monitor is recommended.
5.5. Disconnecting
The connection with the device ends in any of these cases:
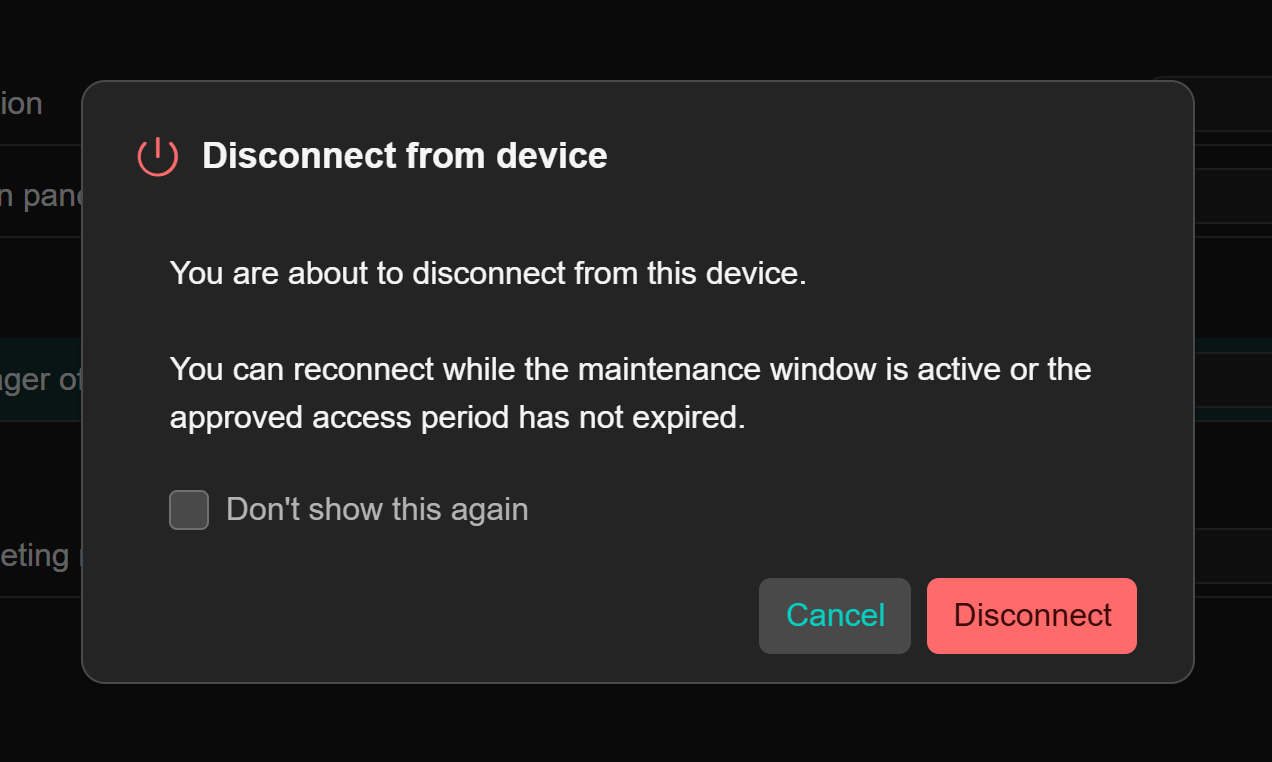
- On pressing “Disconnect” in the footer or the red power button of the device row. The application asks for confirmation (Figure 35), which can be skipped in the future with “Don't show this again”.
- On connecting to another device.
- On signing out or closing the application.
- If the connection with the Internet or with the device is lost. In this case it will be necessary to connect again manually.
While the maintenance access is still valid, it is possible to connect again as many times as needed.
5.6. Special situations during a download
During a download, a KNX bus or network failure is an unstable situation: the download may be cancelled and can be repeated once the installation has recovered. Afterwards, the device or interface list has to be refreshed to reflect the new state.
Note
It is possible to program the Zennio device which is acting as the gateway, so the Zennio device and the device to be programmed can be the same equipment.